Showing posts with label tutorial. Show all posts

Monday, July 27, 2015

Cheap and Easy Homemade Laundry Soap


 I have something a little different for you today. I have been making laundry soap for a few years now and today was the day I needed to make a new batch. I thought I would take a few pictures and share the recipe with you.

It is very easy (takes about 10 minutes) and cheap. This batch is around $8 and will last many months. I make 3 batches a year.
Does it really work? It does. It will get your clothes clean and odor free.

Tools:
large bowl
cheese grater
container for your soap
old teaspoon
wooden spoon
 

Ingredients:
-2 bars of Felt Naptha soap. Grate it up using a cheese grater. 
-Box of Borax. Half of the box. Save the rest for your next batch (I poor the powder outuntil it feels like half)
-Box of Arm and Hammer Washing Soda. Again,  half a box

Mix together in a bowl. Sometimes I have added a few scoops of Oxy Clean (or Biz).


Fill a container and pop in a tablespoon you aren't using (you can pick up all the tools from a thrift shop) . All you need to add to your washing machine  is one teaspoon (I use a front loader. Not sure that makes a difference).

This recipe makes a large batch and I keep what doesn't fit in my glass container in an empty oatmeal tube.

That's all, super easy and inexpensive

Tuesday, March 17, 2015

Scrappy Fabric Card Tutorial


Hello everyone, I have a fun, and very quick tutorial for you. I had a pretty pile of left over rectangles from quilt project and I didn't want to throw them away.

What to do with them? I am in a few swaps on Instagram and I thought a pretty card set might be a fun gift to add to my packages.

I bought my cards here. The quality was great (and I couldn't beat the price). I tied 5 cards with a  vintage fabric measuring tape (or scrap of ribbon).


My cards came open (not folded yet) and I left it that way until the card was done. Cut your scraps into 3 strips sized to your card. I adhered each strip with a light spray of 505 Spray Adhesive and a little pressure on the card.


Sew each rectangle down close to the edge of the card.


Flip your card over and trim the fabric hang over. Yes, my ruler is broken. I just can't get rid of it.

Fold your card along the middle line and press with your finger. All done. Be sure to include the envelopes with your card sets.

As you can see I left the loose strings on my cards. I think it adds to its character but you can trim them neater.

Are you on Instagram? I am. And so is Heather. She will be holding several massive fabric destashes on her account so be sure to follow her and pick up great deals on out of print, hard to find, and new fabrics at great fabrics. 

You can find Heather's destash account under thequiltbarndestash
Her quilty projects are at thequiltbarn
And you can find me too at tinyglutton

Thursday, October 30, 2014

Vintage Quilt Tutorial: Paper Pieced Star


 Happy Thursday and welcome to another tutorial inspired by a vintage quilt. You can see the inspiration for today's tutorial here.

This tutorial is similar to another paper piecing tutorial (hexagons) and you can check it out here


For this block you will need 6 paper diamonds, 6 fabric rectangles (5"X2.5"), and either a glue pen or a needle and thread


Using the paper diamond as a template cut your rectangles leaving a generous 1/4" bigger than the paper. This will cut down on bulk.
Dot a bit of glue in the center of the paper and press to the wrong side of the fabric. This will help keep the paper from sliding around.


Glue basting method:
trace a line of glue down one side of the paper, fold the fabric over and press.


Do the same for all 4 sides. Voila.


Hand sewing method:
Fold over the fabric on the side point and stitch 2 small stitches through all fabric layers.
Go up to the top corner and do the same


I like to heat press my hand sewn diamonds.
Here are 5 hand sewn and 1 glue based diamond


Now to join the diamonds. Place 2 diamonds, right sides together, and sew a whip stitch from point to point. I like to start and stop each end with 2 stitches to add reinforcement.


Ta-da. Matching thread will help make the stitches less noticeable on the other side.


Here is the first unit


Continue adding diamonds the same way. Here is half of the star untit


Stitch the last side by  folding the unit in half and sew from the middle out.


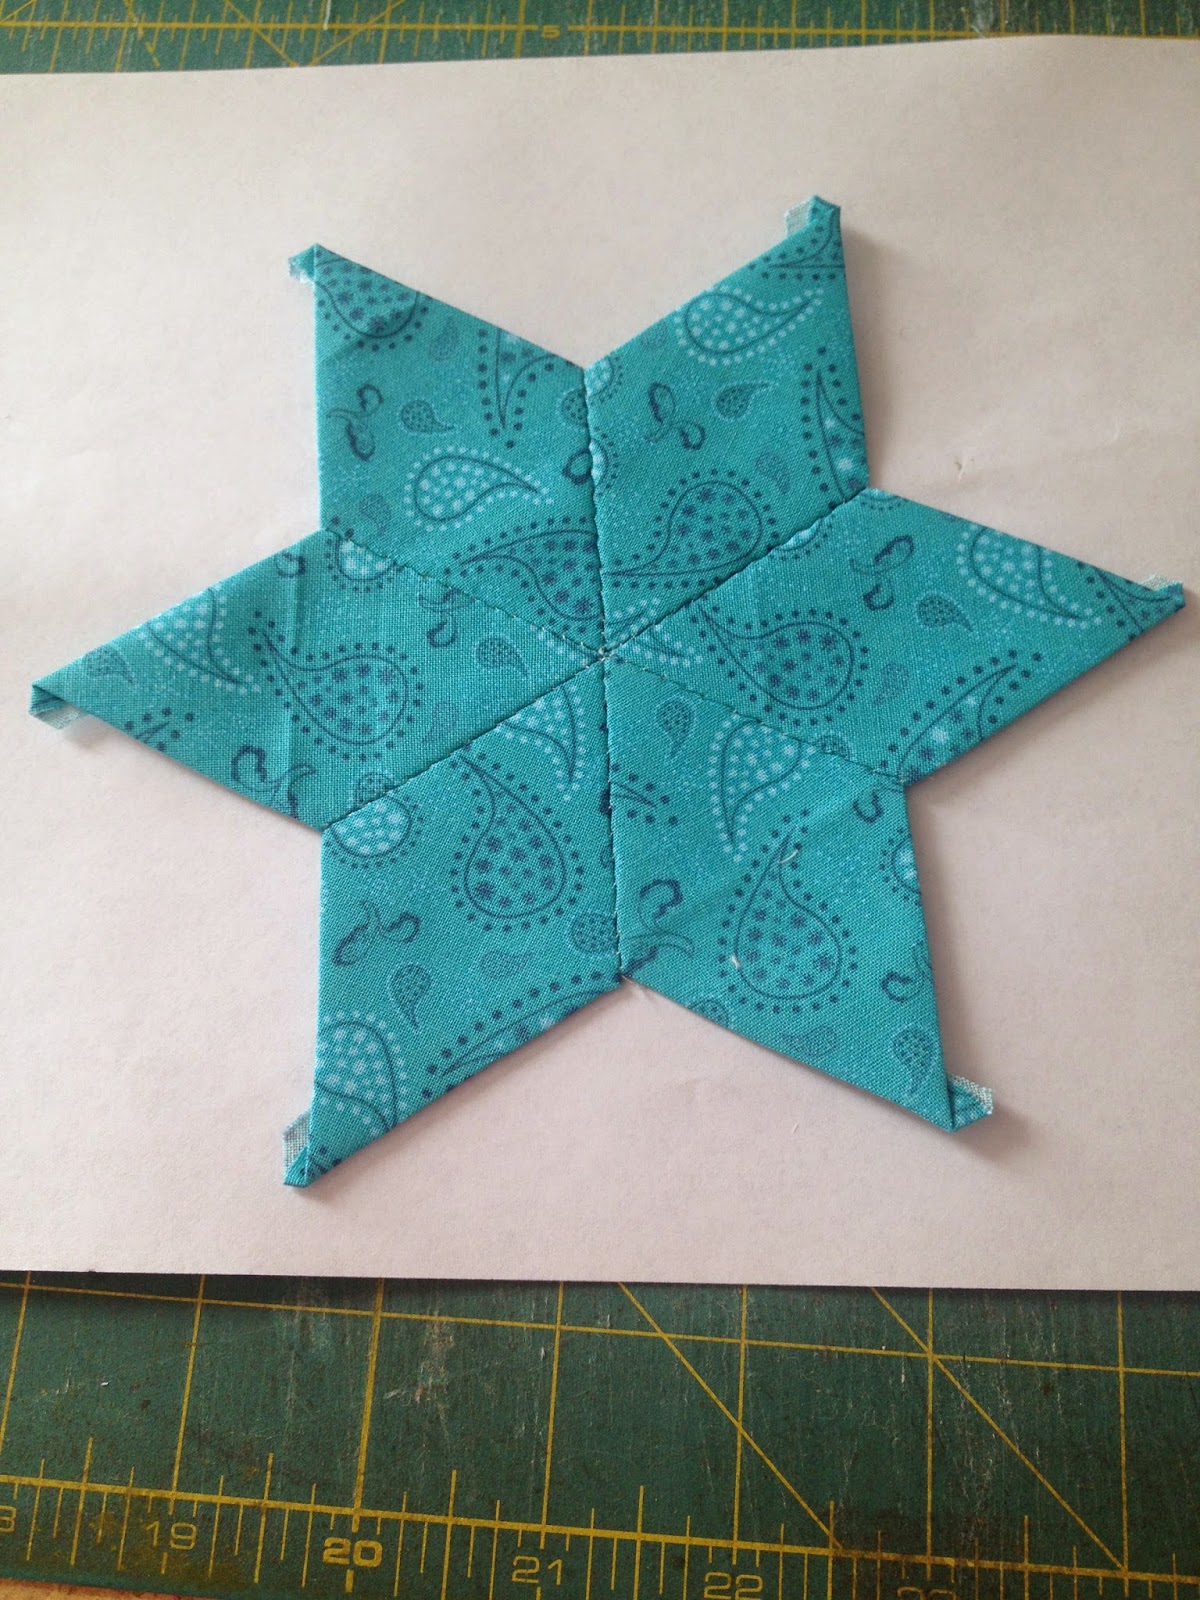
We did it. You can fussy cut your fabric and create a nice spinning effect with the fabric.


After all the diamonds are sewn I iron the center points in a fan to reduce bulk.


You can make add the spacers in the same way as the star pieces. Sew from the outside point to the middle, make a few extra stitches int he center for reinforcement and back up the other side to the outer point.


All stitched up.


And the back.
Next time I will show you a few ways to join your stars and spacers. I will aslo be adding the Sewline glue pens to our Etsy shop if you want to give that a try too.
Thursday, October 9, 2014

Vintage Quilt Thursday: Baby Bow Tie Tutorial


Welcome to another Vintage Quilt Thursday!! Today I am sharing a tutorial for a bow tie block.
You can check out the vintage inspiration here.

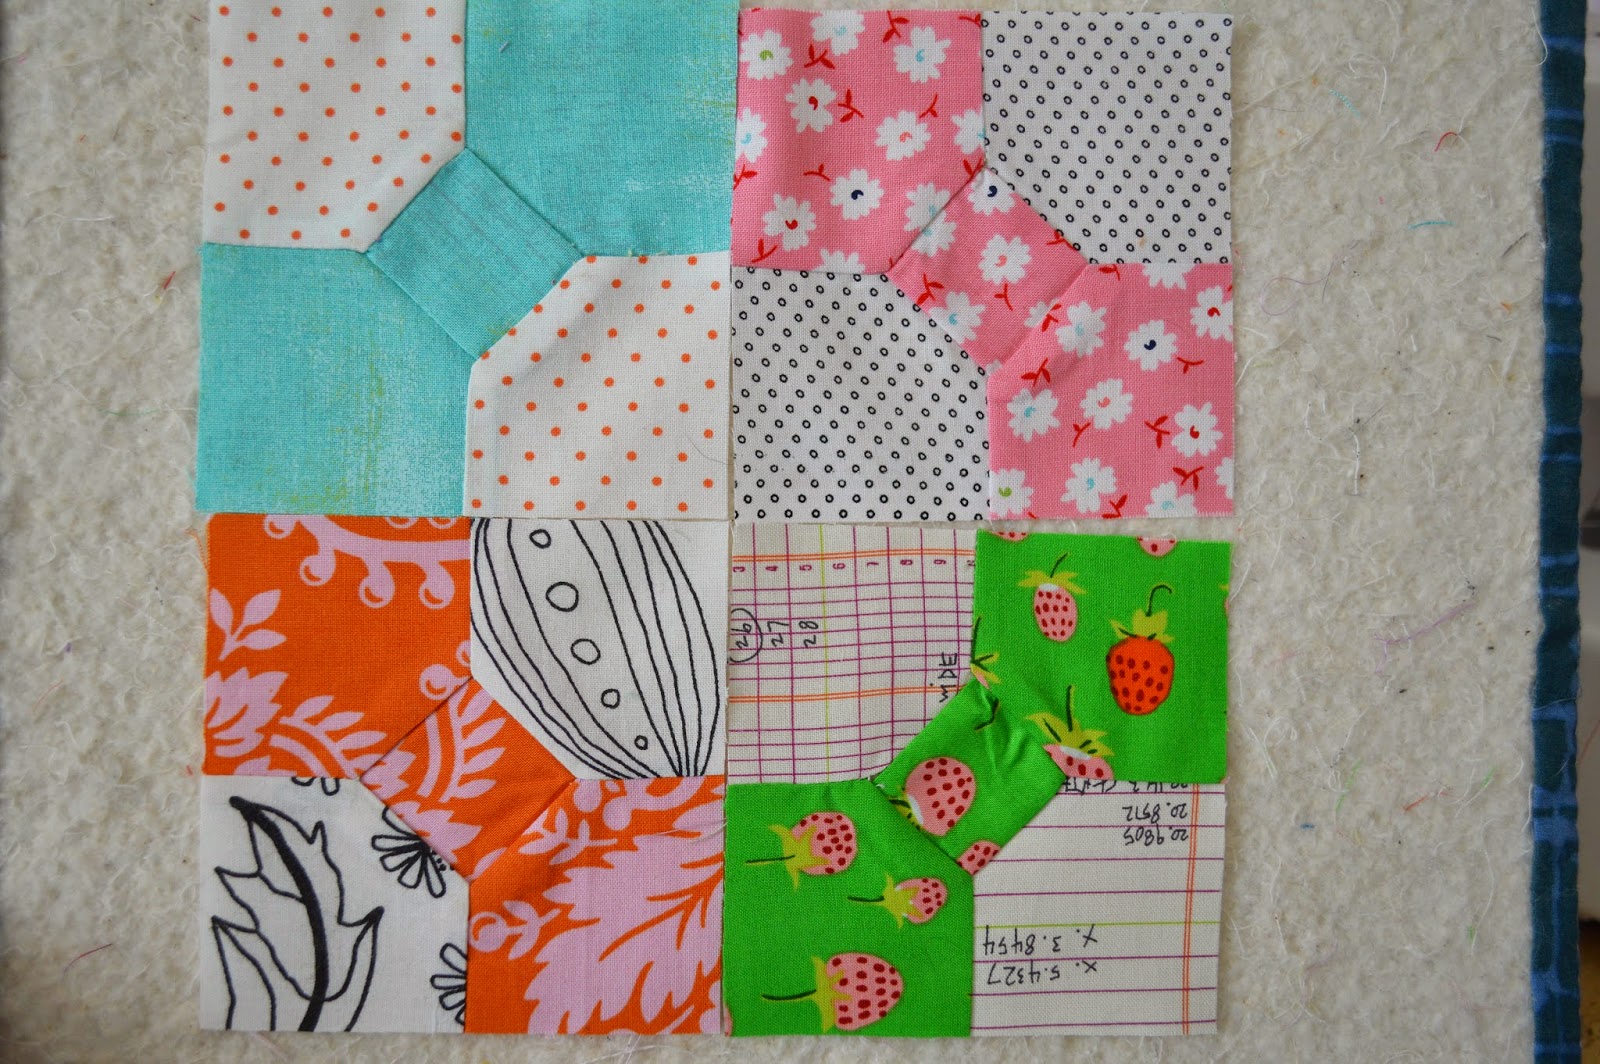
The picture above shows 4 of the blocks put together. Since I am not making a full quilt with the blocks I put 4 together to make one bigger block. This 4 unit block is 7.5" unfinished.

First, CLICK HERE to print out our template. It has 2 pieces, A and B, that you will use to cut our your pieces. You can use the cut paper to trace (that's what I did) or you can trace it on to heavier card stock.


You will need (per block):
1 B piece of bow tie fabric
2 A pieces of bow tie fabric
2 A pieces of background fabric

Trace and cut out these pieces using the printed and cut templates.


This block uses Y seams, or partial seams, so I marked a few of the pieces to help me know when to stop my seam.

One the middle square draw a line on each side 1/4" from the edge. Do the same for the background A pieces. I used a Frixon pen. The drawn line disappears with the heat of an iron.


First we are going to sew the middle bow tie. With right sides together sew the middle B square to the A piece.


Sew your seam just on the drawn line.


Do the same for the other middle square and A piece. Can you see my seam, how it doesn't go all the way from one edge to the other?
Iron your seams


Now for the background pieces. With right sides together lay your background piece on the middle square. Sew a line following the drawn line, starting and stopping before each end.


This step is hard to photograph and will make more sense when you get to this step and can see it in person.
Fold the bow tie unit to the side and line up the background outside edge with the bow tie edge.
Sew your seam from the point (at the edge of my thumb) to the outside edge.
I had to unpick a few seams at this step to get a feel for how far the seam should go to the middle. It doesn't have to be perfect, ironing will help it lay flat.


Sew your seam the same way on the other side of the same piece.
Repeat for your opposite A background block.


Iron and trim. This block is 4" unfinished.


Here is the back.


If you are putting blocks together, like I did, without sashing, there are a few ways to orient the blocks.
This way I create a colorful 4 patch in the middle.


And if I sew them this way I get a different look and all the bow ties go in the same direction.


The 4 patch method will also give you a 4 patch of background fabrics. This would make a fun ring effect with the bow ties.

So, clear as mud? This was a bit more challenging block if you haven't tackled Y seams before.

Check out this new fabric I listed in our Etsy shop. I love the low volume effect with pops of teal. And it has a doily so you know I love it. It is also in our webstore.

See you next time for another Vintage Quilt Thursday inspiration quilt. You can check out our past Vintage Quilt inspirations and tutorials by clicking on the link at the top of the blog.

Thursday, September 25, 2014

Vintage Quilt Thursday: Hourglass Tutorial


Welcome to the Hourglass Block tutorial. You can see the vintage quilt inspiration here.
This is a smallish block (each of the half square triangles is 2").

Here is how to make this fun little block.


 Start with 4- 2 7/8" squares, 2 of each 2 colors.


Draw a line diagonally on the lighter square.


Place the squares right sides together and sew down each side of your drawn line 1/4".
Cut on your drawn line.


Open and press each square. Pressing (placing the iron on the fabric and picking it up to move) rather than sweeping across the block will help to keep the square from getting pressed out of shape.
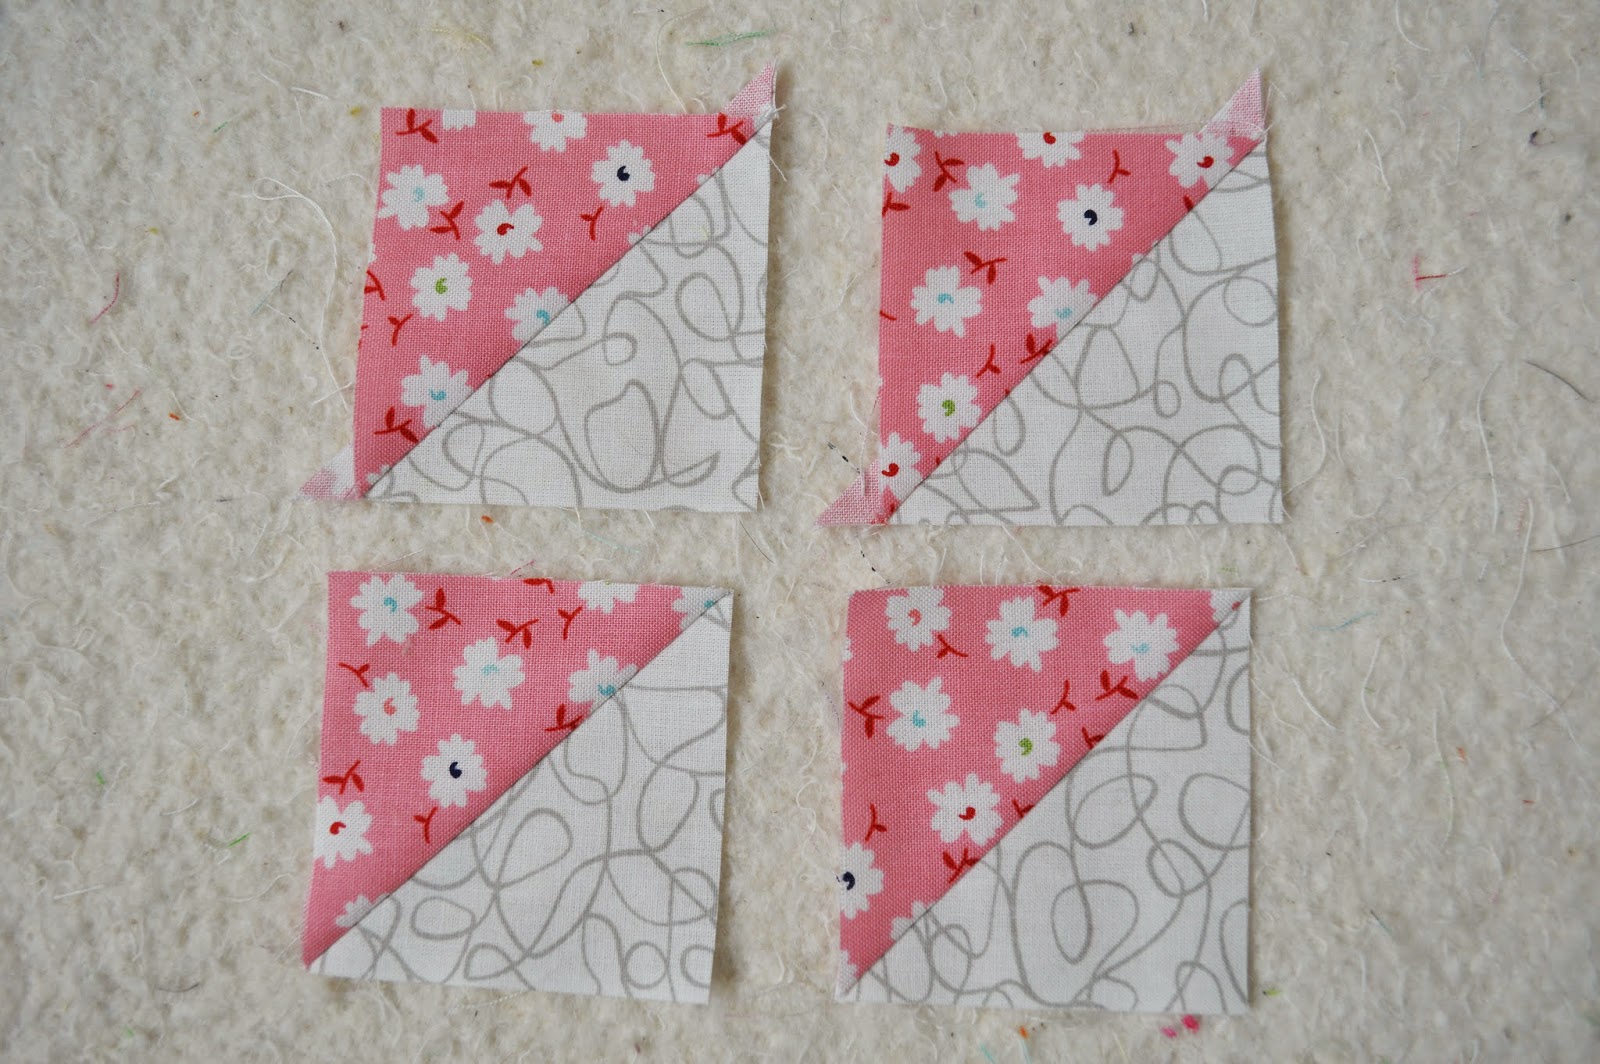
You have now created 4 half square triangles (hst's).
Trim the dog ears (the corner flaps).


Lay the squares out like so.


Sew the squares on the top and bottom


And then join the top and bottom units.
Voila, you are done. Cute, right?


Since I am not making a full quilt out of these blocks (like in the inspiration) I made a few more blocks to see what a bigger block would look like.

This layout features the lower volume prints in the middle. It creates another block in the middle.


Turned this way I get another hourglass block in the middle.


 This placement gives a punch of color in the middle.

You can make this block any size you want. Have a bunch of left over 5" squares? Sew up half square triangles and you get the same block.

Here is a handy chart to help you figure out the finished size for any hst

Check out our past Vintage Quilt Tutorials here on our Tutorials page

Lastly, check out our Jelly Roll sale, while supplies last. See you next week for another Vintage Quilt Thursday!