Friday, September 30, 2011

Couthouse Steps Tutorial


Happy Friday!
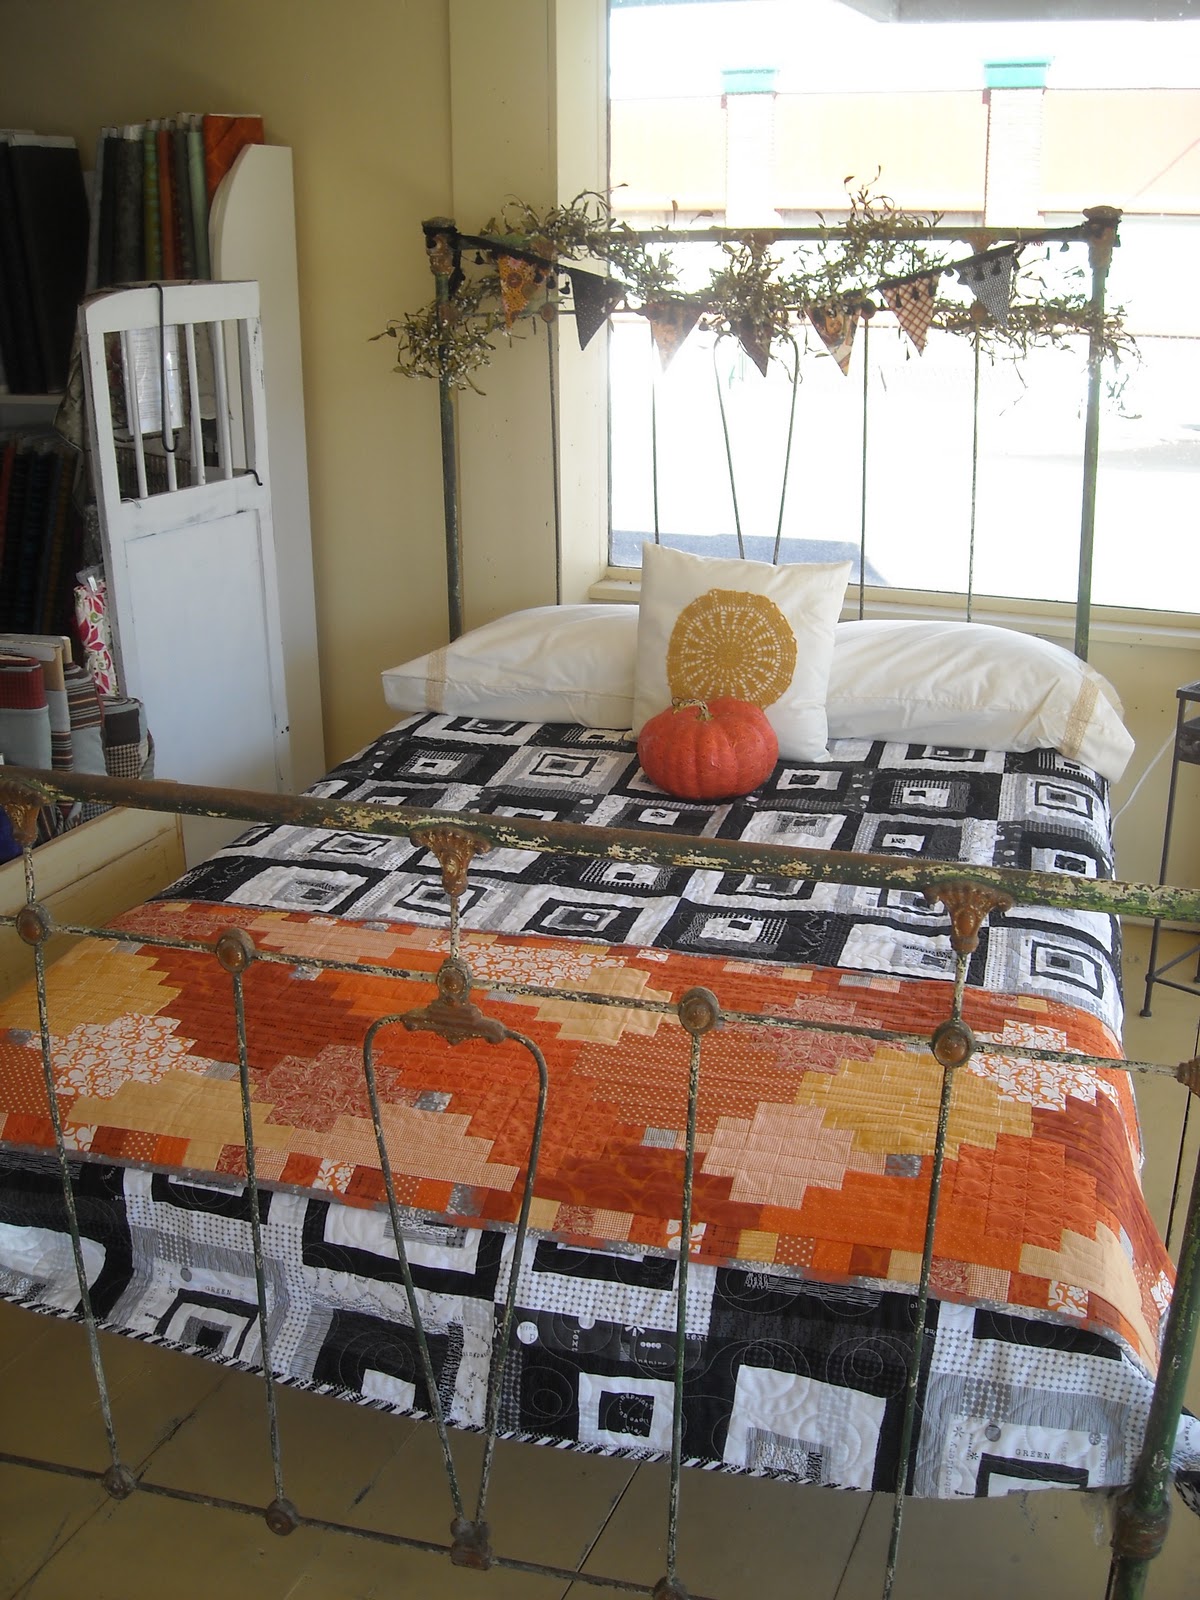
Today is the last project of our Fall Bedroom Tutorials.

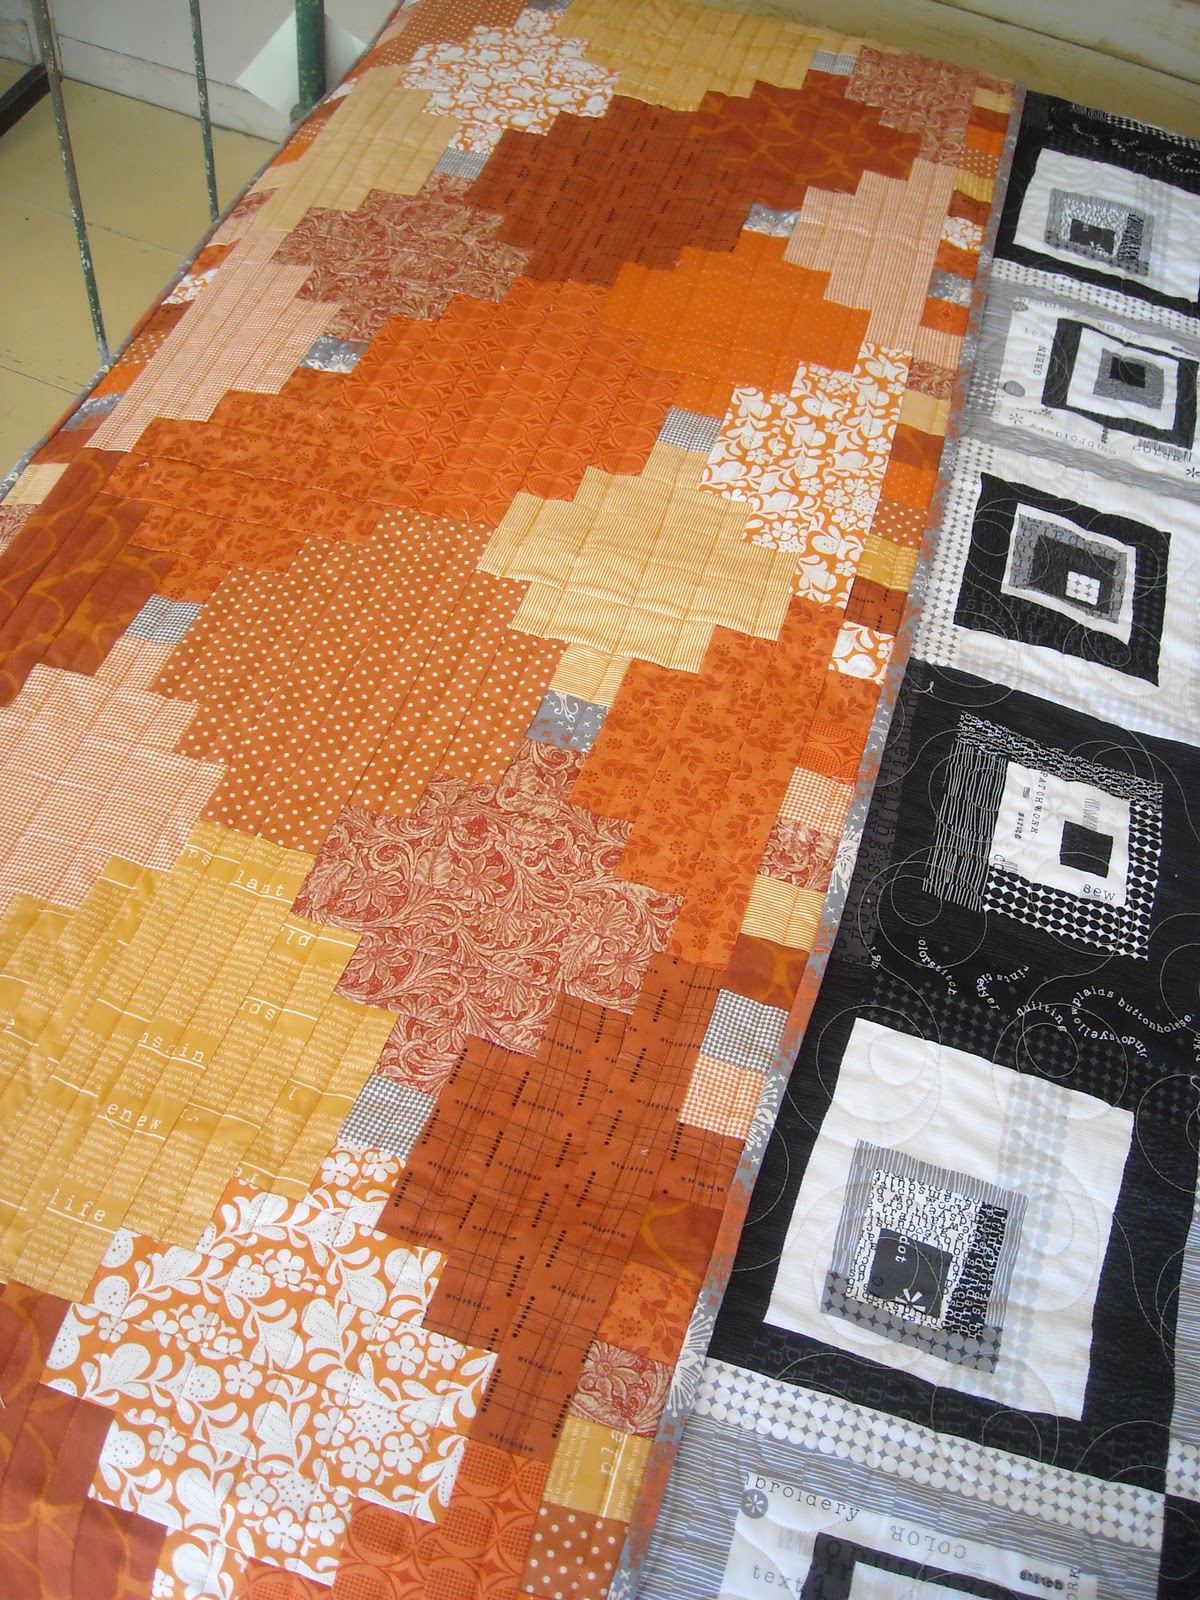
The bed runner is made using using  12 Couthouse Steps blocks. It is kind of like a log cabin block.

Supplies
fabric. For the Queen size bed runner I cut 2-2 inch strips from 13 different fabrics
center block fabric: 1 strip cut into 12- 2" blocks
usual sewing items

For this turorial I am using different fabrics than shown in the bed runner. My center square is the solid green (on the orange bed runner it is grey).

For each block you will be using a center 2" square and 4 different fabrics.
For the first block pick 2 different fabrics and cut 1-2" square from each.
Sew these to opposite sides of  your center square.
Iron open away from the center.


Chose two new fabric strips and sew to each opposite side. I dont cut my strips from here on. After I have sewn on the strips I trim them. This saves having to cut a bunch of pieces.


 Iron open. You have finished your first round (picture above show 2 rounds). You will be sewing on 3 rounds of strips.
Continue sewing on strips in the order of the first round.
If you have directional fabric be sure to sew them on in the same direction.


This is what the finished block looks like after the three strip rounds are sewn on.


For the next block you will need to match the sides from the adjoining block.
Sew the block in the same way and using 3 different fabrics plus the one matching the side. The above 3 side by side blocks share the green and pumpkin fabrics.

For the first row make 6 blocks. Be sure to space out your fabrics.


Let me know if you have any questions


Thursday, September 29, 2011

String Block Pillow


Its Day 3 of The Fall Bedroom Projects Week. Today I am showing you how to make the string block pillow.

Do you save your selvedges? Last fall I got it into my head to cut off all the Halloween and fall selvedges from my stash fabrics. That left me with a big bag of strings. A whole quilt sounded daunting so I settled on a pillow. I love quick projects.


Supplies:
strings (selvedges from fabric. I leave 1" to 2" of printed fabric showing when I cut them)
4 phone book pages cut to 8.5 inch blocks
backing fabric 18.5" square
border fabric 2- 2" strips
18 inch pillow form
usual sewing items


1. start by laying a long string down the middle of the paper. Tuck another string under the white edge of the first one.

2. sew down the first string close to the edge.


3. continue sewing on strings down the right hand side

4. when one side is done start on the left hand side of the block lapping the strings as you sew them on.


5. when the block is full flip it over and use the paper as your guide and trim the block.

6. rip the paper off the block. Make 4 blocks


7. join two blocks together as shown. make 2 sets


 7. sew the two sets together as shown.


8. add the border strips to all four sides using a 1/4 inch seam

9. with right sides together and using a 1/4 inch seam sew around the string block front and backing leaving a wide opening on one side. Trim the corners to reduce the bulk

10. turn the pillow right side out poking out corners. Insert pillow and whip stitch the opening closed.


11. Enjoy the pillow! I may start trimming all my Christmas stash now too.


I am linking today to
Amylouwho's Sew N Tell Friday
Just a Girl Show and Share Day
Finding Fabulous

Chic on a Shoestring Decorating

Wednesday, September 28, 2011

Halloween Bunting Tutorial


Today is Day 2 of The Fall Bedroom Tutorial Week. Today's tutorial is for the bunting, or flags, that are draped on the headboard. You can see the full room reveal here

The one I made uses different fabrics than the one in the window but the same vintage trim.

I dug out my Ghastlies stash for this project. This is one of my favorite lines and I was so glad to see it re-released with new designs this year.

Supplies:
Fabrics of choice including the backing fabric
cardboard (I used a cereal box) or template plastic
trim for hanging the flags from (I also like to use the twill tape that comes with the layer cakes)
usual sewing items


This is how I came up with my triangle shape template. I decided I wanted the top of the flag to be 7 inched wide. I made marks at the 0 and 7 line. I also made a mark in the middle at the 3.5 mark.
I drew a line down from the 3 marks to how long I wanted the flag to be.  I drew a line from the 0 mark down to the middle mark on the bottom and then the same for the other side.
A perfect triangle.
On either the back or the front trace the template on to the fabric, minding any directional print. I didnt want any upside down pumpkins. Do the same for the backing fabric.
I made 8 flags but you can make yours any size.


Take a front and a back fabric and place right sides together. Sew 1/4 inch all around leaving 3 inches along the top open for turning.
Clip the corners to reduce bulk.


Turn right side out, poke the corners out and iron flat. I like to off set the seam and iron first. This makes a crisper edge.

Edge stitch around the flag making sure to catch the open edge on the top.
Sometimes it can be hard to start sewing on the corners. When I get to the corner I pull out some thread and use this to pull my piece from behind to get it going past the feed dogs. Trim these after.


Lay out all the finished flags and decide on an arrangement.


Lay out the trim at this time too and measure out how long it needs to be. Sew on the trim attaching each flag.
Done!


Tuesday, September 27, 2011

Christmas on a Dime - Take II

This afternoon, I'll be presenting at the Mt. Harrison Guild Meeting in Rupert.  I'm re-posting a great snippit from last fall with an abundance of inexpensive, handmade Christmas Gift Ideas. The Holiday season doesn't have to be a burden on our budget. Dig into that stash and create fun gifts from the fat quarters that you have so lovingly collected over the years. Really, it's a "twofer" - y'know, a two for one... you'll be cleaning your sewing room as you prepare for Christmas. Start now and take the stress out of the season!

Here are some of my favorite links to quick, easy homemade projects. These come from all over the "blog world" and I would ask that you respect their copywright requests. They are very kind to share their talents, patterns, and ideas!

The Ultimate Handmade Holidays Master List by Sew Mama Sew - more ideas than you could sew in a lifetime!

The Domestic Diva's "A Month of Holiday Gifts to Sew" - a project for every day, complete with tutorials!

From headbands to checkbook covers, you will find over 50 more projects and tutorials at Domestic Cents

Skip to my Lou has a fun list of gifts you can sew - Everything from Lunchboxes to Crayon Rolls! She has another huge list of projects HERE. Amazing!

Moda Bake Shop is an amazing collaboration of some of incredible pattern and fabric designers making free project patterns for YOU! Have a Jelly Roll and you aren't sure what to do with it? Search by Jelly Roll and choose from 8 pages, dozens and dozens of adorable projects. LOVE IT!!!

Blogs are a treasure chest of fun ideas to help you keep your holiday budget in tact. Let's get started!!!! See you at Guild!

Heather

Fabric Pumpkin Tutorial


Hi, welcome to the first tutorial from our Fall Bedroom Window. If you didnt see The Quilt Barn's Fall window take a peek here. All week we will be showing you how you can make these projects.

First up are he fabric covered pumpkins. I was inspired by the latest issue of Country Living. They used paper but I thought why not fabric.

 What you will need:
funkins (fake pumpkins)
Modge Podge
sponge applicator
scissors (not your good ones)
fat quarters
drop cloth
disposable container (for the modge podge. I used a large yogurt tub)


1. ge t your pumpkin ready. Take off any stickers or tags. Lay out the drop cloth and pour some modge podge in the tub. Cut your fabric into strips. I made mine about 2 inches wide.


2.Using the foam brush coat an area of the pumpkin top to bottom  slightly wider than the fabric stip.
   Use your fingers smooth the first strip over the modge podge getting it into the pumpkin grooves.

 3. Go over the strip with more modge podge smoothing down the edges. Continue by repeating step 2 and 3, slightly overlapping the strips. Trim the tops of the strips if needed at an angle as you curve around the stem


4. The modge podge will dry clear but be sure not to leave any large drips.


5. Dry overnight.  You can embellish it further by painting the stem or tying something around the top, like raffia or a ruffle.

I love Modge Podge and have so many ideas using it with fabric.

Monday, September 26, 2011

Fall Bedroom Projects


 I'ts hard to believe it is Fall already. Last week it was in the 90's. I'm ready to bring out my sweaters, bake some pumpkin muffins and drink cider. I might put those things on hold until the weather cools off. In the mean time I wanted to get into Fall gear. I love fall the best out of all 4 seasons.

 Lori and I were discussing the windows at The Quilt Barn and we came up with 2, if I do say so, great ideas (the second idea will be posted later this week or next and I am super excited about it too).
The black cheater quilt turned out so great we knew it needed to go on the bed. Black is so chic and a great fall color, I think. It needed a pop of color and nothing is more fall than orange. I would have loved to have made a queen size quilt for my bed but time was not on my side.


Along the top of the iron bed is a bunting flag using fabric and vintage ric rac.


I struggled with what pattern to use for the bed runner. The fabric was easy. I just went around the store and pulled every orange bolt. Not all made the cut and I ended up with 13 different half yard cuts.
I ended up making up a Courthouse Steps as the pattern and added a squares strip around the outside. What do you think?


I have a soft spot for these crocheted lovelies. If I can think of a way to use them every season or occasion I do. And I did this time. I bought some orange liquid dye (not easy to find in a BSU loving town) and had plans of dying a doily as a pumpkin. I ended up finding an orange one so the dye got put aside for another project. I might add a little green wool stem.
The fabric pumpkin is a project idea taken from some Country Living inspiration.

The pillow was made out of Halloween and Fall selvege and pieced using a paper pieced string block method.
We have a few more ideas for this window but I wanted to show you what we had done today.
These projects were so fun and easy that I am going to show you how to make them. Everyday th
is week I will share how to make these fun fall projects. Make sure to check back.

I am linking up here


WIP Wednesday at Freshly Pieced


The Creative Girl
Sew Can Do
The House in the Roses
So Very Creative
Someday Crafts
Creations by Kara

Friday, September 23, 2011

Jenele's Love Quilt


I just had to show you Jenele's Love Quilt.Is'nt it stunning?


Jenele was inspired by Tonya Ricucci's quilt, Rumspringa. Her blog is Lazy Gal Quilting. The link to the inspiration quilt is here.
Jenele didnt have a pattern to work with so she just winged it. Three cheers for winging it Jenele!
We have since got in Tonya's book Word Play Quilts and made up a solids packet so you can play around too.


I had to show you the back. Its a great quilt in itself.
Jenele quilted this one her home machine eye balling the lines as she went.

I am linking up to
Funky Junk Interiors
Tatertots and Jello

Thursday, September 22, 2011

Wear it Thursday


Happy Thursday! I like Thursday's cause its all about making clothes. This week I am sharing clothing for kids again but next week I am hoping to have an adult piece to show.
I love Oliver & S patterns. They are so classic and sweet. I have the Jump Rope Dress in my sewing queue.


There's the pattern, down there in the bottom. The paper doll covers are a great idea.
This jacket's exterior and interior is made out of flannel.


Have you made anything to wear this week? Have you made something with an Oliver & S pattern?
If you did share it with us on our flicker group. I'd love to see what you have been up to.

I am linking up to
Freckled Laundry's Textile Party
Amylouwho's Sew n Tell
Funky Junk Interiors
Tatertots and Jello