
Day 2 - Zippers!
If you are intimidated by zippers, you won't be after today! I make my entire Sew Together Bag with my walking foot. It glides right over the zipper teeth and gives me beautiful results. If you don't have a walking foot, I would recommend one for Day 4 forward. For now, you can use a zipper foot if you'd like.
If you haven't already, iron your interfacing to the back of your B1 - B4 pieces.
Then, put your pocket lining pieces into sets of 2. Lay the pieces out as shown in the pattern starting with B1, then your first set of 2 pocket lining pieces, and so forth.

PART 1: Following Step 3 of your pattern, lay the first piece with a zipper face down as shown:

Be sure to open the zipper half way. If you are using longer zippers, line the top of the zipper with the metal stopper about 1/2" from the top of the fabric. Pin one of the pocket linings from Set 1 on top of B1 with Right Sides Together (RST).

Sew B1 and the pocket lining with the zipper sandwiched between as shown. Stop just before you get to your zipper pull and if possible, leave your needle in the down position. Lift your presser foot as far as you can. Most machines can "hyper-extend" - giving you additional space under the presser foot.

With your pressure foot lifted as high as you can, move the zipper pull to the top, where you have already sewn. You can do this with your fingers, but it's much easier if you have an awl or a old seam ripper to grab the zipper pull and slide it up as shown below. Be careful not to scratch your zipper if you use an old seam ripper. I recommend applying clear fingernail polish to the sharp inside edge of an old seam ripper to use just for zippers - because it's so darn handy!

Sew to the end. Hold the zipper teeth and place B1 and the pocket lining with Wrong Sides Together. Make sure they are taut and match up on the top and bottom. Unzip the zipper half way, then topstitch 1/8" from the edge of the fabric as shown below:


PART 2: Place the second pocket lining in set 1 face up. (if you are referring to the layout picture, this pocket lining was tucked behind the yellow/orange one in the picture) This Lay section 1 on top of pocket lining as shown:


Lay B2 on top of zipper with Right Side Down:

Pin and sew as you have done before, stopping to move the zipper up.

Lay your project flat so that B2 and the second pocket lining are wrong sides together as you did with B1 . Make sure they are taut and match up on top and bottom. Topstitch along the edge of the fabric next to the zipper.

This is what your project should look like from the back.

Congratulations! You installed a zipper! Now you will repeat Step 1 and Step 2 just two more times. Place your project right side up and lay the next zipper face down as shown:

Repeat Step 1 and 2. Here are some pictures to guide you through...


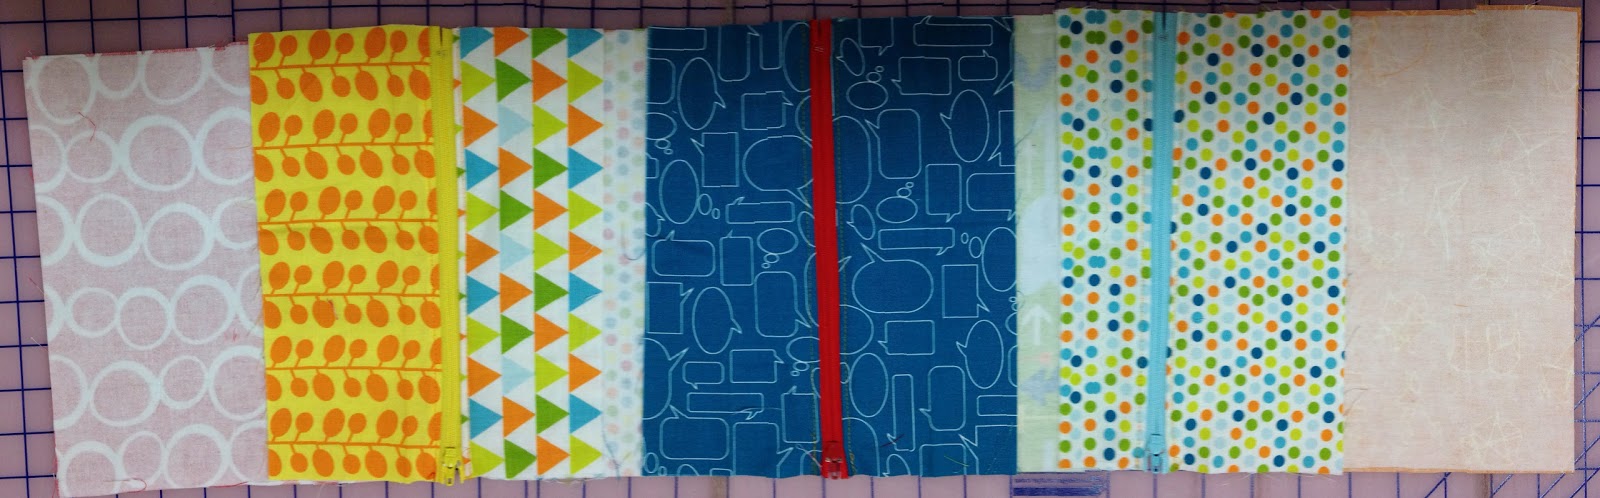
Wahoo! Day 2 is complete! Now, before I show you what your end result should look like, I have a giant disclaimer. I took these pictures using my iphone panoramic function, which if you've ever used it... you know that you have to move your phone while trying to keep a little mark lined up in the middle the entire time. So, that being said... my project isn't wavy like the picture, I promise. This is just to give you an idea of how your bag should look after Day 2.
Front: (Note that the polk-a-dot piece is wider in real life!)

Back: (Again, width of pieces may "appear" distorted due to my lack of iphone panoramic skills LOL!)
Don't forget to post your progress to our Flickr Group and Instagram #sewtogethersewalong
Until tomorrow...
Heather

OMG!!
ReplyDeleteHeather this is fantastic!
Can't wait for my zips to arrive so I can sew along!
I am so glad I found your sew along! I have already picked up some great tips!! This would have been so great to have as a visual when I made my first bag!!
ReplyDeleteStarting on this on Monday or Tuesday....can't wait!
ReplyDeleteI absolutely love the fabric you used for this bag! I hope this tutorial goes on being in your blog because I'm going to purchase the pattern and I will need it when I make it (as soon as I buy all the material)
ReplyDeleteThanks for this great tutorial and photos
Thanks for the great tutorial as I am not very confident with zips - it was easy to put together.
ReplyDeleteI have only sewn one bag so far, am just now finding this Sew along - but one tip I found on another web site was to use a longer zipper for the bags and that way you can open them all the way from the very beginning of sewing the zippers on and not have to keep moving the tab - then whip stitch a 'stop' and try off the ends - no worries either about metal pieces when you're sewing the bags into the side pieces.
ReplyDeleteThank you so much for this series of posts! We are doing a Sew Together Bag Sew-a-long and your photos are really helpful.
ReplyDeleteMe gustaría saber las medidas de los trozos de las telas para poder cortarlas
ReplyDeleteI want to tell you my thanks for your tutorial - it is so perfect to follow. I completed Day 2 and will start now with Day 3.
ReplyDelete