Day 3
Before we start this next section, you will want to trim any excess zipper material from the top and bottom of your project.
Place your project face up as shown on section 4 of your pattern. Place your ruler so that the center of the zipper lies directly under the 3 1/4" mark.
Using a frixion pen or air eraseable marking pen, draw a line on the sections as illustrated in section 4 of your pattern.
When the 3 sections are marked, pick up your project by the first zipper:
Make sure all 4 layers are nice and taut, line up the sides, and secure with a pin on each side.
Sew through all 4 layers along the marked line.
Repeat with the other 2 zippers.
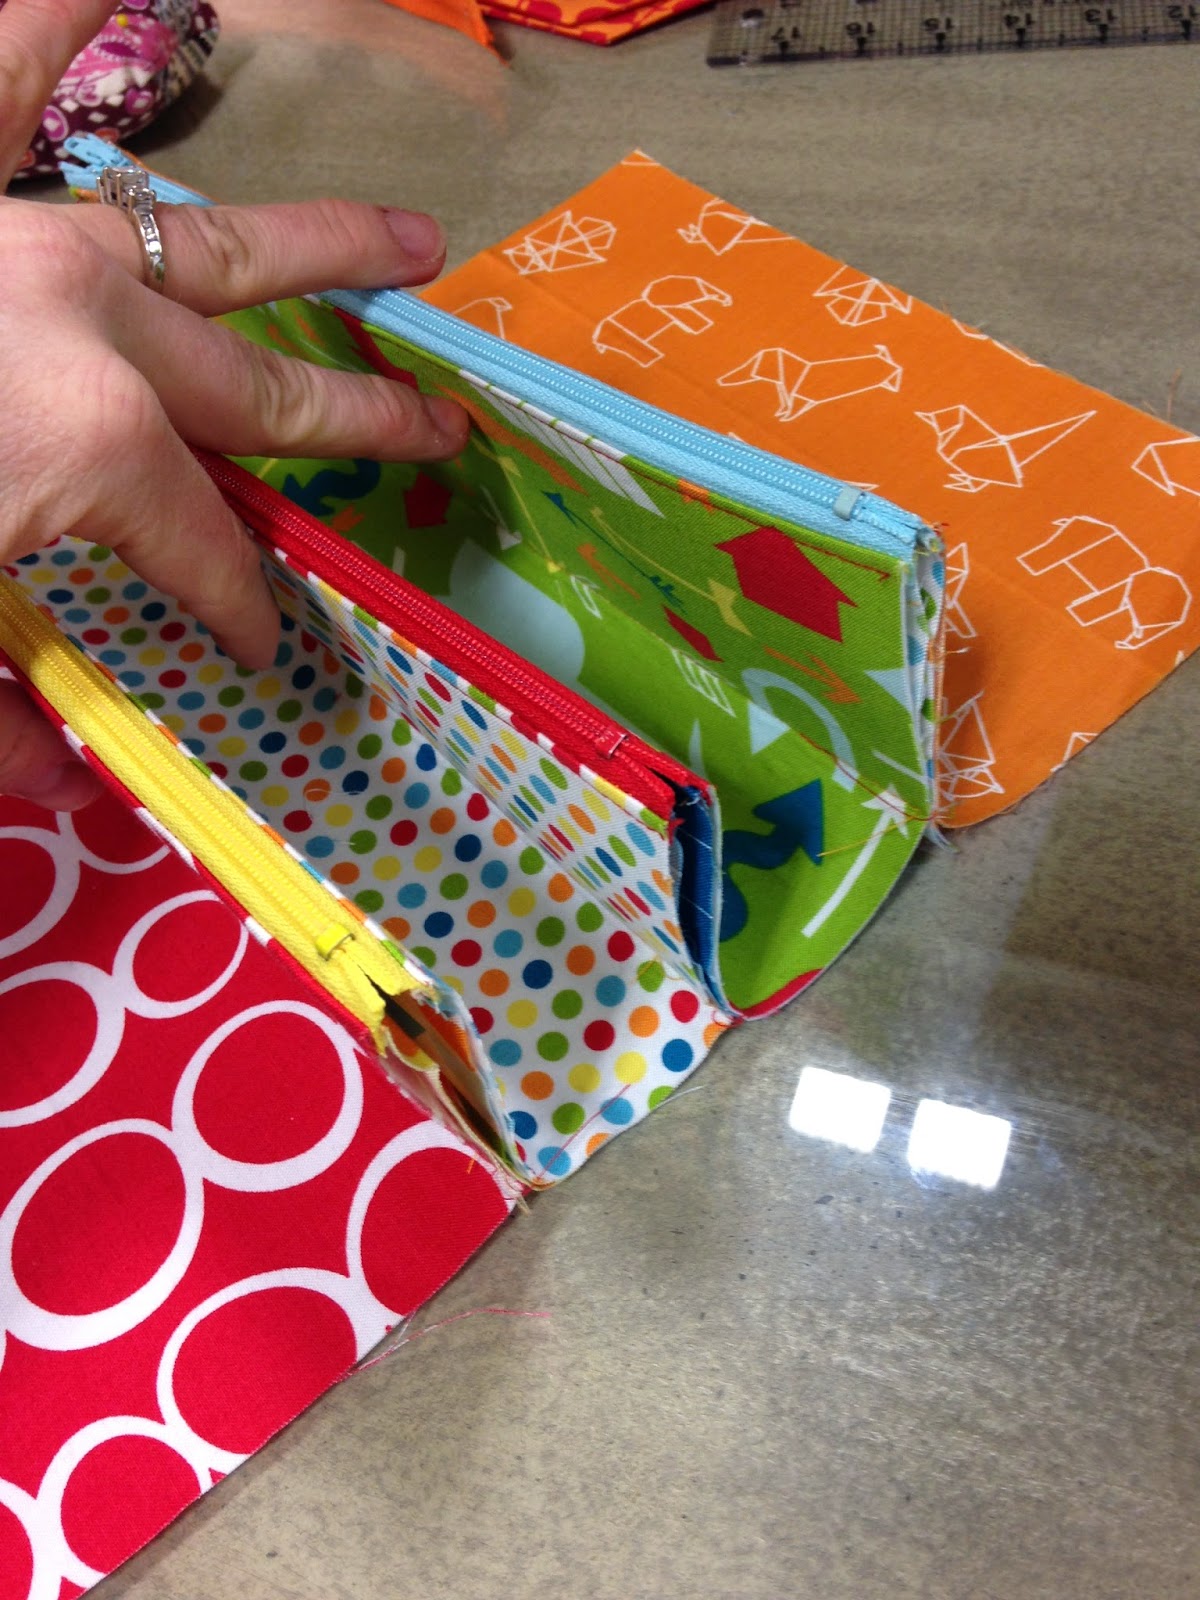
Your project will now look like this:
Now, taking one zipper pocket at a time, zig zag down each side starting at the marked line stitch and sewing toward the zipper.
Use a fairly narrow zig zag so it doesn't show in your seam allowance later.try to keep mine at about 1/8" inch.
Repeat for all 3 zipper pockets (six sides total). Your project now looks like this:
Tomorrow we will attach our side panels. Leave a comment and let me know how the zippers went for you yesterday - I'm dying to know!
Don't forget to post your progress to our Flickr Group and Instagram #sewtogethersewalong
Until tomorrow...
Heather


Thankyou so much for doing this tutorial, your instructions are so good. I managed to do the zips OK but still have a bit of trouble getting them even, I know its just practice.
ReplyDeleteby the end of my 12 zippers yesterday, I felt like a professional!! Finally got the top stitching looking exactly like I wanted too!!
ReplyDeleteOh my.....I am so glad for this quilt along! I have spent the morning reading the pattern and felt a little confused, although I think the pattern is well written, until I went through it again with the photos. I really am a visual learner, and this has helped so much!
ReplyDeleteThis is a super fun project and way easier (for a first time bag maker like myself) to follow along with you. Thanks so much for setting all this up! My zippers went in fabulously yesterday; super slow (getting over some minor aches), but great. I can't wait to make more sew together bags after this one! I'm posting my progress on Instagram. ;)
ReplyDelete-Katelyn
I was a bit befuddled about the zipper process until I found your wonderful photo instructions! A picture is truly worth a thousand words!!!! I love the pattern and the bags and the construction is a breeze now. Thanks for helping us all out.
ReplyDeleteLove the tutorial. The pictures are so helpful to a visual learner.
ReplyDeleteI am in the process of making two of these bags. Your photos are incredibly helpful. I find the written instructions lacking and would not have been able to make this bag without your tutorial. Thanks so much!
ReplyDeleteThank you so much for the tutorial! It is making the process MUCH easier.
ReplyDeleteOh my gosh this was step I needed clarification. Thanks very helpful
ReplyDeleteGreat instruction. This was the step I needed help with. Thanks
ReplyDeleteMuito obrigada pelo tutorial.
ReplyDeleteI am sorry I missed the first two, is there a way to get them?
ReplyDeleteThank you! I've had this pattern for so long but felt intimidated by it. But with your sew along I feel confident that I can make it!
ReplyDeleteGreat tutorial. Thank you so much. Now to find the others...
ReplyDeleteI've had the pattern for about a year and thanks to your wonderful sew along, I am half done!
ReplyDeleteHow can i get this full tutorial?
ReplyDeleteHi,
Deleteat the top of the blog, to the right is a fuschia image that says Sew Along. Its under the Glamp Stitchalot image. Happy Sewing
This comment has been removed by the author.
ReplyDeleteAmei. Obrigada por ensinar.
ReplyDeleteLove your fabrics! So bright and cheerful!
ReplyDeleteWhere is Day 1?
ReplyDeleteYou can find the Sewalong tab on our side bar. Thanks!
DeleteYou can find the general Sewalong tab on our side bar. Hope this helps
ReplyDeleteThis is excellent, thank you!
ReplyDelete